
In today’s data-driven world, geospatial data has become increasingly vital across various industries. From optimizing logistics to making informed decisions in urban planning, geospatial data offers valuable insights. Microsoft Azure offers robust solutions for geospatial data integration, and in this blog, we’ll explore how to use Azure Data Factory Dataflows to seamlessly connect with Azure Maps and extract geospatial information like city, state, latitude, and longitude from a CSV dataset stored in an Azure Storage Account.
Understanding Azure Data Factory Dataflows
Azure Data Factory Dataflows is a powerful cloud-based data integration service that empowers organizations to create, schedule, and manage data-driven workflows. These workflows, known as Dataflows, can connect to diverse data sources, transform and enrich data, and automate data processes, making it a versatile platform for data integration.
Leveraging Azure Maps for Geospatial Insights
Azure Maps, a cloud-based mapping platform within the Microsoft Azure ecosystem, offers an array of geospatial services, including geocoding, routing, and spatial analysis. By combining Azure Data Factory Dataflows with Azure Maps, organizations can efficiently extract, transform, and utilize geospatial data, providing location-aware insights that can fuel informed decision-making.
Seamless Geospatial Data Integration Using Azure Data Factory Dataflows
To seamlessly integrate Azure Maps in your Azure Data Factory Dataflows for extracting city, state, latitude, and longitude points from your CSV data, follow these steps:
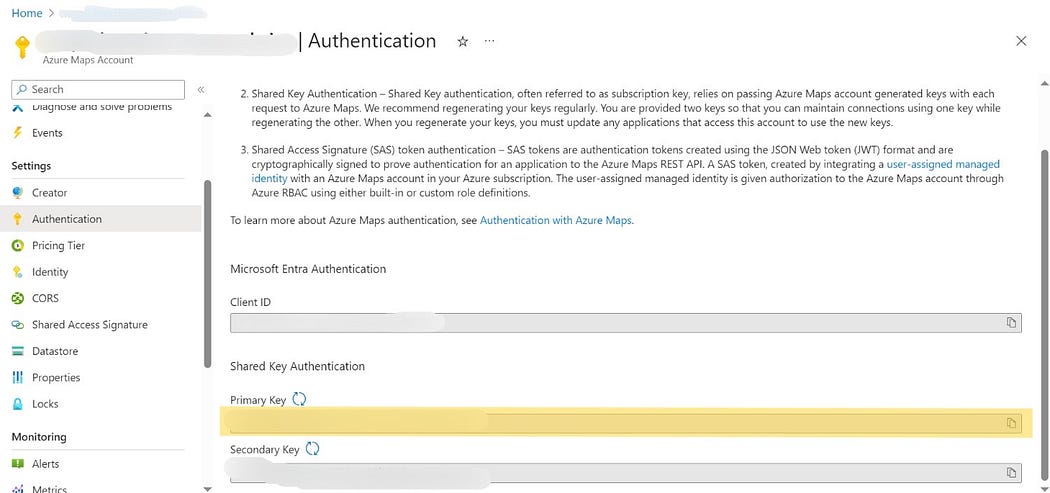
Set Up Azure Maps Resource: Begin by configuring an Azure Maps resource within your Azure subscription. This resource provides access to the geospatial services required for extracting location-based information.
To establish an Azure Maps service and acquire the necessary subscription key for authenticating your Azure Data Factory (ADF) pipeline’s access, please refer to the instructions provided in the following links:
- Create your Azure Maps Service.
- Obtain the subscription key required for your Azure Maps service account using the steps outlined here:By following these links and storing the subscription key, you’ll ensure that your ADF pipeline is properly authenticated to utilize the Azure Maps service, enabling seamless integration of geospatial data into your workflows.
Upload Sample Data To Azure Datalake Storage Accounts: Configure Azure Storage Account as Datalake to set up the source and destination of data transformation.
- Create a data lake storage account with the name of your choice and create a container named ‘geospatial-repo’.
- Create two folders ‘\Source’ and ‘\Destination’ to map source and sink datasets respectively.
- Upload the sample.csv file to the folder ‘\Source’

Establish an Azure Data Factory Dataflows: If you haven’t already created an Azure Data Factory, initiate the process and configure a Dataflows activity within it.
- Create an Azure Data Factory pipeline named ‘geospatial-integration’.
- Create a mapping dataflow activity named ‘dataflow_geospatial_integration’.

Data Source Configuration: Within your Dataflows, establish a source dataset linked to the CSV data stored in your Azure Storage Account.
- Click on the Dataflow activity in the pipeline canvas to open its settings.
- Inside the Dataflow activity settings, under the “Source” section, you can configure the source dataset.
- Select ‘+’ under the option available for dataset within source settings to create a new dataset.
- Create a new dataset named ‘source’ after creating a new linked service to access data from datalake storage account.
- Select the container ‘geospatial-repo’ and select the file by navigating into the folder ‘Source’.
- Click ‘Create’ to complete the process of setting up source dataset.
- Turn on Dataflow debug option in dataflow activity to see the stage-by-stage data tranformation within it.
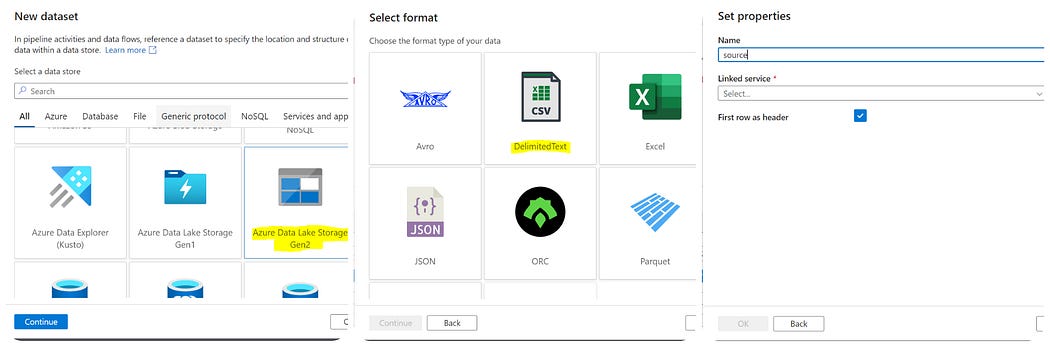
Creating A New Dataset In Azure Data factory

Creating a linked service and configuring the dataset to read from the Source folder.
Integration via External Call Activity: Incorporate the “External Call” activity into your Dataflows. This activity enables you to communicate with Azure Maps services through HTTP requests.
Follow the steps below to establish connection between your datafactory dataflow and Azure Maps using linked services.
- Click ‘+’ available right below source and search for ‘External Call’ and select the option to add external api activity as a part of dataflow activity.
- Select the activity, navigate to the activity panel and click ‘+ New ’ on the linked service to create a new linked service to access azure maps.
- Name the linked service to ‘MapsAPI’ and in place of base url paste this following URL. https://atlas.microsoft.com/search/address/json
- Keep Authentication Type to “Basic”, Under the field “User Name” fill the value ‘API Key’ and in place of ‘Password’ paste the subscription key that you have copied while creating Azure Maps service.


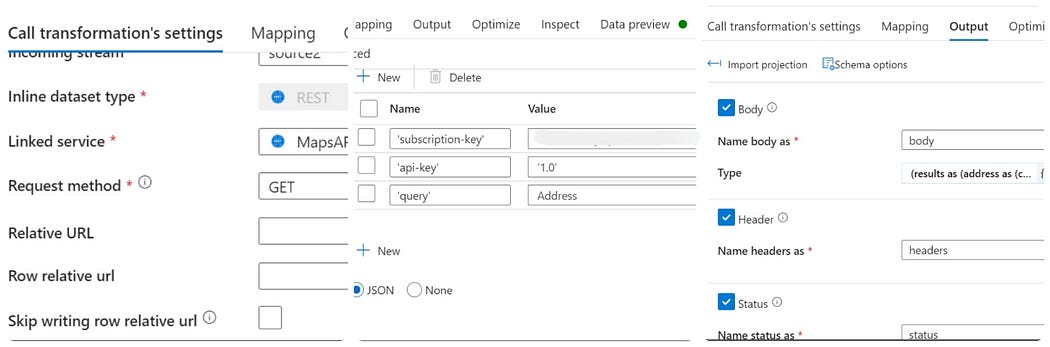
Configuring External Call Activity: Configure the external call activity to use address from source dataset to query Azure Maps API for geospatial details by following the steps below.
- Select ‘Call transformation’s settings’ tab in the panel appearing after selecting ‘External Call’ api activity.
- Keep ‘Request Method’ to “GET”.
- Add a Query parameter ‘subscription-key’ and fill the subscription key copied while creating Azure Maps inside single quotes.
- Add a Query parameter ‘’api-key’’ and fill value ‘1.0’ against it with single quotes.
- Add a Query parameter ‘query’ and fill it with value Address without quotes to dynamically pass values from ‘Address’ column in the source dataset.
- Navigate to the output tab inside the panel and click on ‘Import Projection’ to add the api response to the dataflow activity.
Extract Attributes Using Derived Column Activity: To extract attributes like latitude, longitude, City, State and Country from the api response, follow the steps below.
- Click ‘+’ icon below the external call activity and select ‘Derived Column’ activity from the list appearing.
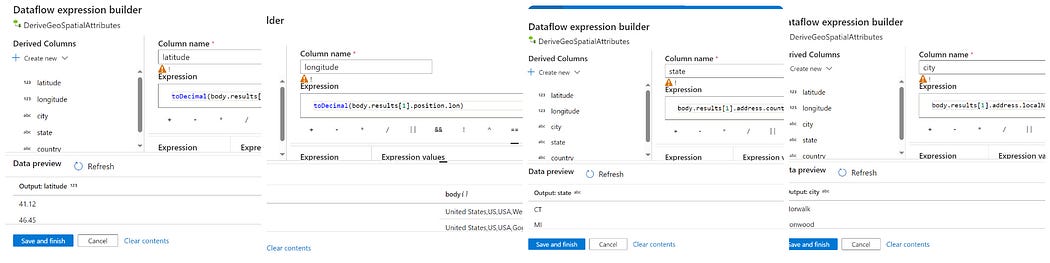
- Add a new column ‘latitude’ and click on dataflow expression builder.
- Inside dataflow expression builder add toDecimal(body.results[1].position.lat) to extract latitude point
- Click on ‘Create New’ under Derived Columns and add a new column ‘longitude’.
- Against longitude fill in the expression ‘toDecimal(body.results[1].position.lon)’ to extract longitude point from the response.
- Add a new field ‘city’ and fill the expression ‘body.results[1].address.localName’ to extract city.
- Add a new field ‘state’ and fill the expression ‘body.results[1].address.countrySubdivision’ to extract state.
- Add a new field ‘state’ and fill the expression ‘body.results[1].address.country’ to extract country.
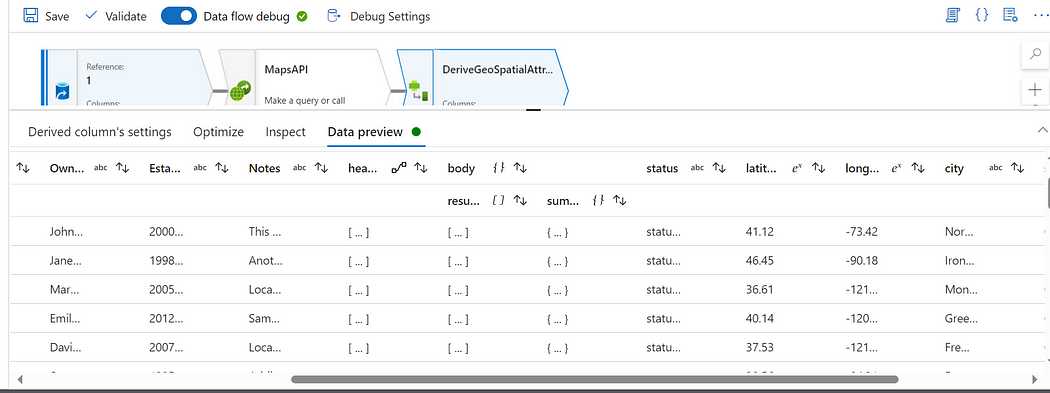
- To preview the results against each of the attribute click ‘Data Preview’ option and click ‘Refresh’ to see the results.
- Once configured click on ‘Save & Finish’. Go back to the dataflow activity click ‘Derived Column’ activity and click ‘Data Preview’ to view the extracted fields ‘city’, ‘state’, ‘country’, ‘latitude’ and ‘longitude’ appearing in the output.
-
-
-
- Preview images while extracting attributes from api response
-
-
Publish The Output To Destination Sink: To publish the output of the pipeline follow the steps below.
- Click ‘+’ icon below the ‘Derived Column’ activity search ‘sink’ activity and select it.
- Under the panel appearing for sink activity click on ‘+’ to create a new destination dataset.
- Follow the steps we used to create source dataset except the target dataset will be pointing towards the folder ‘Destination’ instead of ‘Source’.
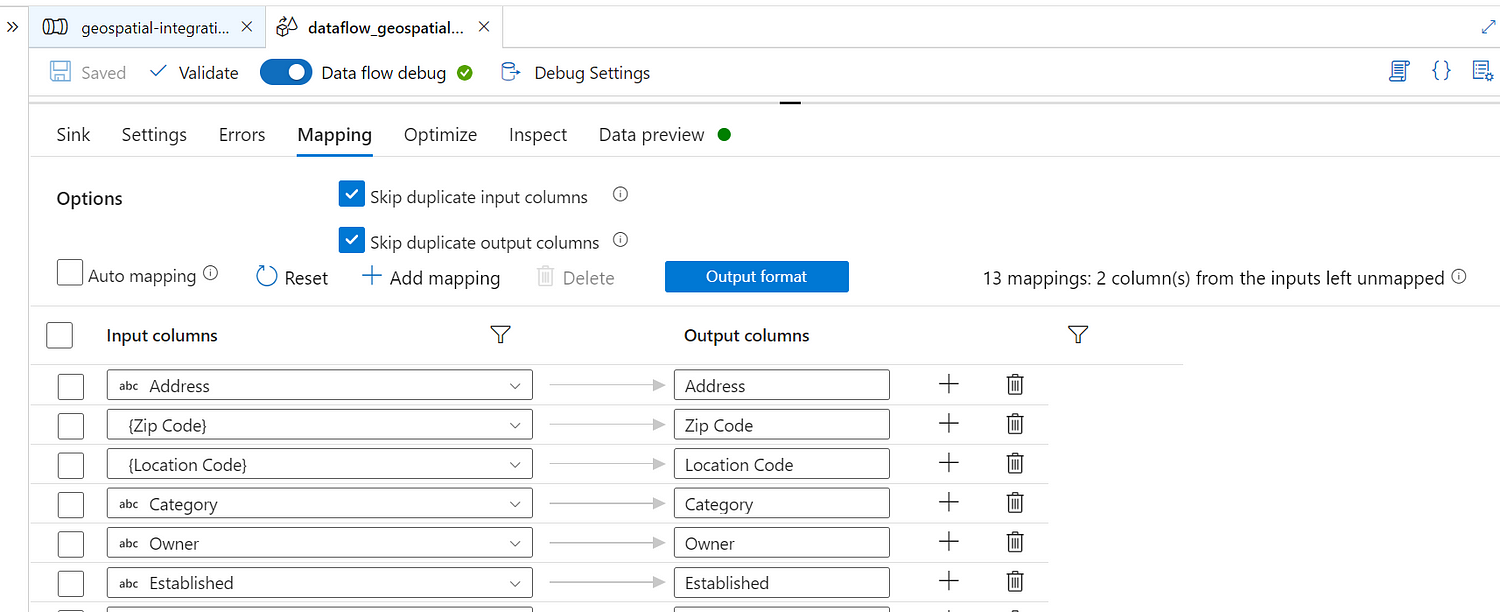
- Navigate to the ‘Mapping’ tab, uncheck ‘Auto Mapping’ and remove attributes ‘body’ and ‘headers’.
- Click ‘Save’ appearing next to the top of dataflow activity.
- Navigate to the pipeline and select ‘Debug’ to run the pipeline without publishing it and see whether the transformed data published to Azure Storage Account under the ‘Destination’ Folder.
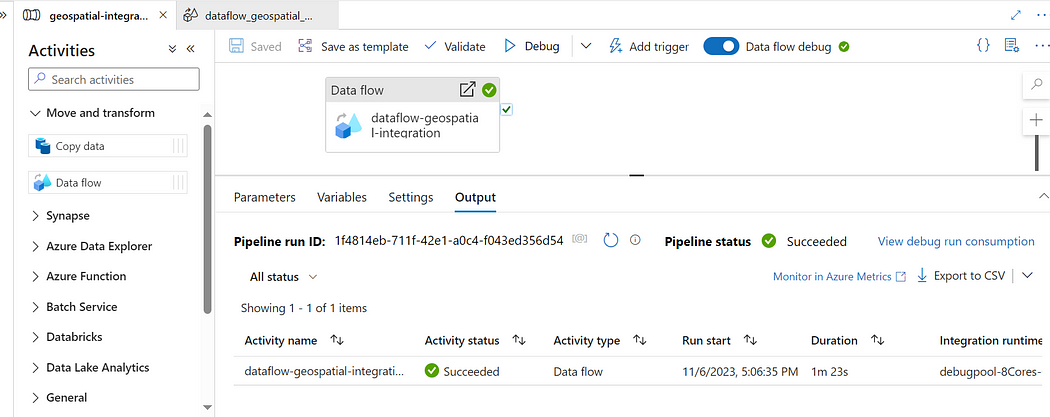 Running pipeline in debug mode to publish results to storage accounts.
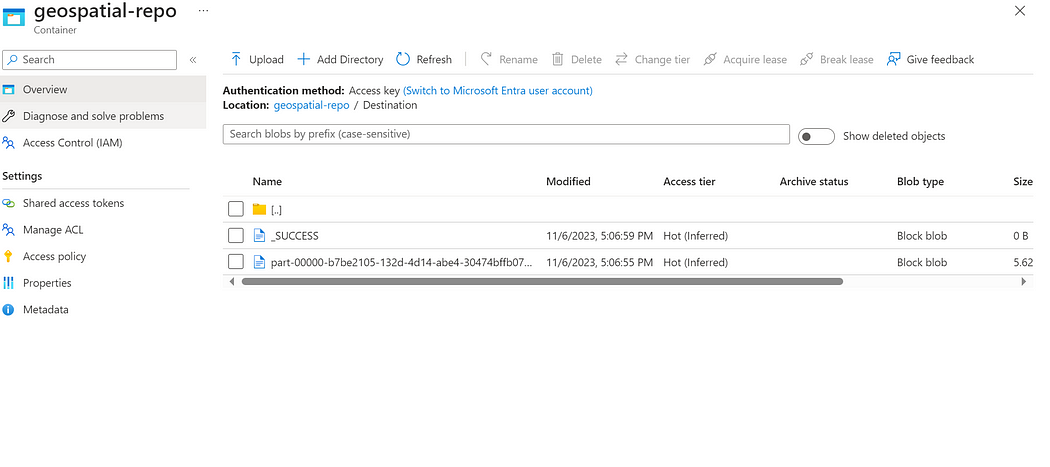
Snapshot from storage account showing output published from data factory.
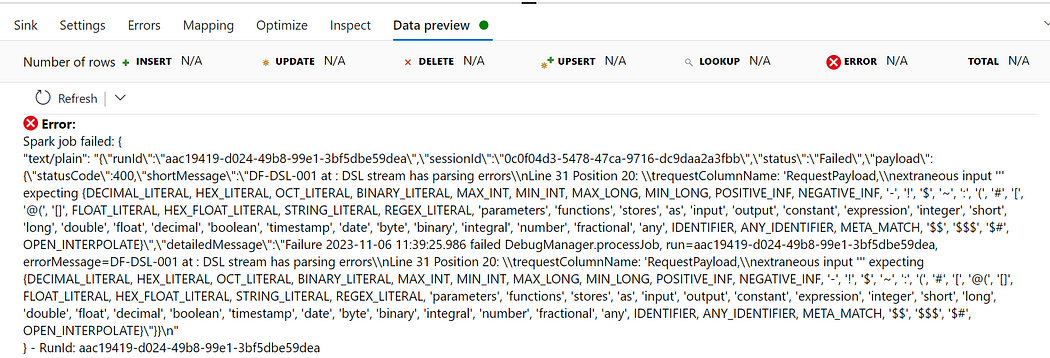
Ignore this error while creating dataflow activity.
Conclusion
Leveraging Azure Data Factory Dataflows for geospatial data integration with Azure Maps opens new avenues for organizations to make data-driven decisions enriched with location-aware insights. This integration streamlines the extraction of geospatial data from a CSV dataset and ensures that organizations can harness this valuable information to optimize operations, enhance customer experiences, and gain a competitive edge. By combining the capabilities of Azure Data Factory Dataflows and Azure Maps, you can unlock the full potential of your geospatial data and empower your organization to thrive in today’s data-centric landscape.